
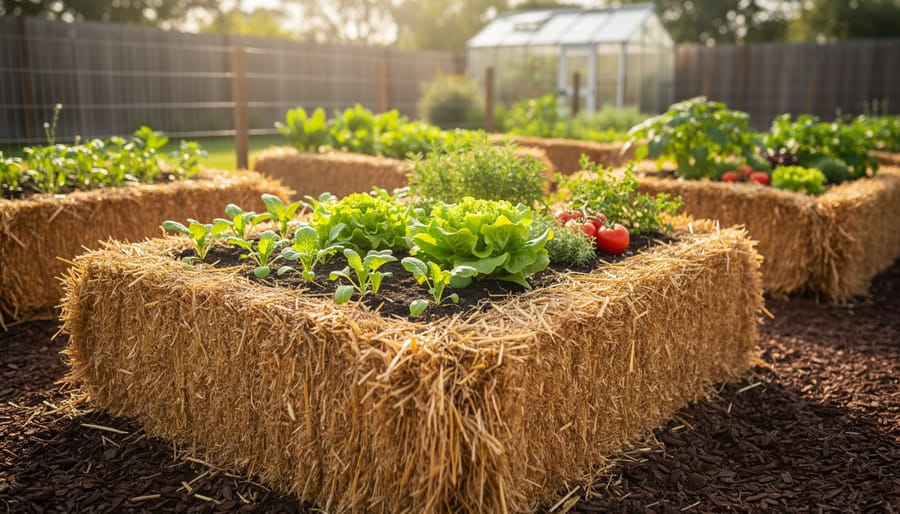
How to Start a Straw Bale Garden in 7 Simple Steps
Straw bale gardening transforms rectangular blocks of straw into productive, self-contained growing beds that need no tilling, less weeding, and can extend your growing season by weeks. This method is particularly valuable for Zone 3 gardeners who face short summers and challenging soil conditions. Instead of fighting clay-heavy or rocky ground, you condition the bales with water and nitrogen over about two weeks, then plant directly into the decomposing straw.
The process works because the conditioning phase kickstarts decomposition inside the bales, creating warmth and nutrients while maintaining good drainage. The bales become living compost factories that feed your plants throughout the season. For those of us dealing with Alberta’s unpredictable weather patterns, that extra warmth means you can plant tomatoes, peppers, and squash earlier than you would in conventional ground beds.
What makes this method especially appealing is its accessibility. You don’t need perfect soil, extensive bed preparation, or even much space. A sunny spot, a handful of bales, and consistent watering during the conditioning phase are enough to get started. The bales themselves provide structure, drainage, and growing medium all at once.
The gardeners in our community who’ve tried this method appreciate how forgiving it is. Root vegetables, leafy greens, and heat-loving crops all perform well once you understand the conditioning process and positioning requirements. The learning curve is gentle, and the results show up fast enough to keep you motivated through that first experimental season.
What You’ll Need to Get Started
Getting your straw bale garden started doesn’t require a long shopping list, but each item plays an important role in your success. Whether you’re starting a vegetable garden for the first time or adding a new method to your Zone 3 toolkit, gathering these materials beforehand makes the process smoother.
Here’s what you’ll need:
- Straw bales: Choose bales held together tightly with twine, made from straw rather than hay, which contains weed seeds and tends to be too dense for proper drainage and root growth
- Water source: You’ll need consistent access for the conditioning process and ongoing watering throughout the growing season
- Nitrogen source: Organic fertilizer or composted manure to help the bales begin their partial decomposition during conditioning
- Compost or potting mix: A few bags to fill planting pockets and give seedlings a good start
- Seedlings or seeds: Transplants work best for most crops, though you can start seeds indoors ahead of time or direct-sow certain vegetables into prepared bales
- Hand tools: A trowel for making planting holes and a watering can or hose with a gentle spray attachment
The most critical choice is your bales themselves. Look for straw bales with tight twine binding that will hold together through the growing season. Avoid bales made from wheat or oats treated with herbicide during production, as residual chemicals can harm your plants. If you’re unsure about a bale’s source, ask the supplier directly about herbicide use.
Straw and hay look similar, but straw is the hollow stem left after grain harvest, while hay is cut grasses and legumes complete with seeds. That distinction matters. Hay will sprout a forest of weeds in your garden, creating far more work than you bargained for.
Most of these materials are available at garden centers, farm supply stores, or directly from local farms. Gathering everything before you begin lets you move through the setup process without interruption, which is especially helpful in our shorter Zone 3 growing season when every day counts.
Important Things to Know Before You Begin
Before you rush out to buy bales and start planting, a few critical considerations will save you frustration and wasted effort. Getting these fundamentals right makes the difference between a thriving garden and a disappointing experiment.
The straw versus hay distinction matters more than you might think. Hay is essentially dried grass and contains countless weed seeds that will sprout throughout your growing season, creating a maintenance nightmare. It’s also packed much tighter than straw, restricting water flow and root development. Straw, by contrast, is the hollow stems left after grain harvest, it’s mostly seed-free and has the open structure plants need.
When sourcing bales, ask about herbicide treatment. Some wheat and oat straw comes from crops sprayed with persistent herbicides that remain active long after harvest. These chemicals can stunt or kill your garden plants, and there’s no easy fix once contaminated bales are in place. If your supplier can’t guarantee herbicide-free straw, look elsewhere.
Location planning is equally important. Your bales need at least six hours of direct sun daily and easy access to water. Straw bales dry out faster than ground soil, so dragging a hose across your yard multiple times a day gets old quickly. Choose a spot you can reach comfortably and won’t mind looking at all season.
Plan for a two-week conditioning period before you can plant anything. This isn’t optional, it’s the foundation of the entire method. You’ll need to add water and nitrogen regularly to trigger the partial decomposition that creates a plant-friendly environment inside the bales.
For Zone 3 gardeners, timing matters. Start conditioning after your last expected frost date, which typically falls in late May across much of Alberta. This ensures your bales are ready for transplants when the growing season truly begins, without risking cold damage to tender seedlings.
Step-by-Step: Setting Up Your Straw Bale Garden
Step 1: Choose Your Location and Arrange the Bales
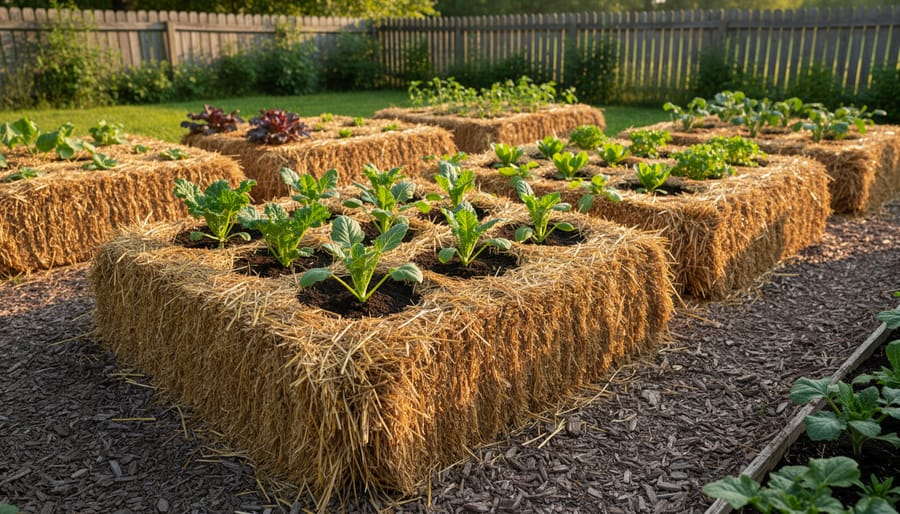
Start by scouting your sunniest spot. Straw bale gardens thrive with six to eight hours of direct sunlight daily, so pick an area that gets consistent sun throughout the growing season. Consider proximity to your water source too, you’ll be watering frequently, and dragging a hose across the yard gets old fast. A level surface makes things easier, though you can work with gentle slopes.
Once you’ve chosen your location, arrange your bales in single rows rather than clusters. This simple layout might seem basic, but it makes a real difference for air circulation and sun exposure. Every bale gets equal access to light and breeze, which helps prevent moisture-related issues as the season progresses. Single rows also let you reach plants from both sides without stepping on decomposing straw.
Orientation matters more than you might expect. Position each bale with the twine on the outside and cut ends facing up, this is where you’ll be planting. The cut ends reveal the hollow straw tubes that run vertically through the bale, creating natural channels for water and roots. Placing bales with the wrong side up creates unnecessary headaches later.
We’d love to see how you arrange your space. Share your layout plan in our community forum, especially if you’re working with a tricky yard or limited area. Zone 3 gardeners always find creative solutions worth celebrating.
Step 2: Condition Your Bales
Conditioning transforms your straw bales from raw material into a growing medium that plants can actually use. Without this step, you’d essentially be trying to grow vegetables in a pile of dry stems, not ideal for anyone, especially in Zone 3 where we need every advantage we can get.
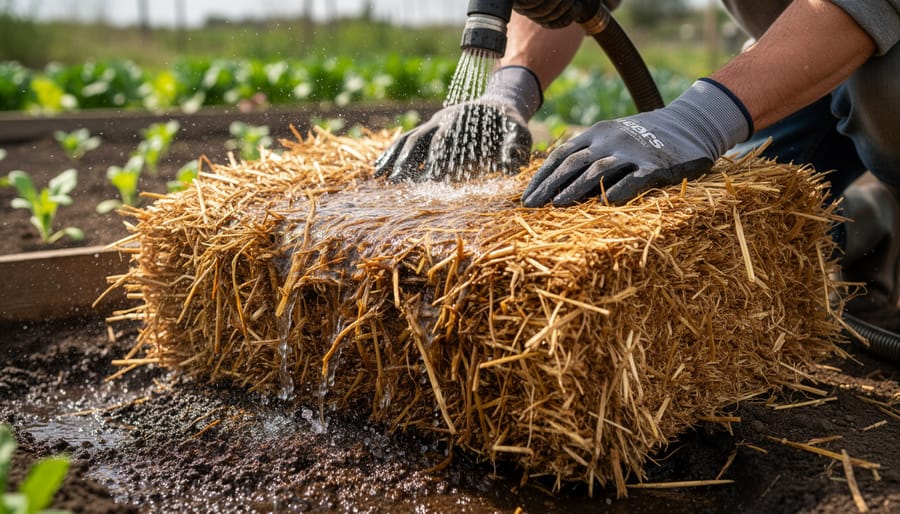
The process works by adding water and a nitrogen source to kickstart partial decomposition inside the bales. This breakdown creates warmth and releases nutrients while making the straw soft enough for roots to penetrate. You’ll start by thoroughly soaking your bales, they need to be wet all the way through, not just damp on top. Over the following days, you’ll alternate between adding nitrogen (such as a balanced fertilizer or blood meal) and plain water, continuing to keep the bales consistently moist.
As decomposition begins, the bales will heat up inside. You can check this by pushing your hand into the center, it should feel noticeably warm, sometimes quite hot. This heat is your sign that beneficial microorganisms are doing their work. The conditioning period typically runs about two weeks, though timing varies with weather conditions and your nitrogen source.
You’ll know conditioning is complete when the internal temperature drops back down and the bale feels cool to the touch but still holds moisture well. The straw should have a softer, almost composted texture rather than the crisp, dry feel of fresh bales. Rush this step and your plants will struggle; give it proper time and you’re setting yourself up for a thriving garden.
Step 3: Monitor the Conditioning Progress
Your bales are ready for planting when they’ve cooled down and feel like rich compost inside. During the conditioning process, the interior will heat up as decomposition begins, this is exactly what you want. Check the temperature by pushing your hand a few inches into the bale’s surface. Early on, it might feel quite warm, even hot to the touch. As conditioning progresses, that heat will gradually decrease.
Moisture is equally important. The bale should feel consistently damp throughout, like a wrung-out sponge. If you squeeze a handful of straw from inside, it should hold together slightly without dripping. Too dry means you need more water; soggy means you’ve overdone it and should let things dry out a bit before continuing.
Watch for visual changes too. The straw will darken and soften as it breaks down. You’ll notice the bale becoming slightly shorter and more compact. When you pull at the straw, it should separate easily rather than feeling stiff and scratchy.
Once the interior temperature has dropped to match the surrounding air and the bale feels cool to the touch, you’re ready to plant. The exact timeline varies with weather conditions and your nitrogen source, so trust these signs rather than watching the calendar.
Step 4: Prepare Planting Spaces
Once your bales are conditioned and ready, it’s time to create homes for your plants. Use a trowel or hori-hori knife to cut small holes or slits into the top of each bale. For larger plants like tomatoes or peppers, dig down about 4-6 inches into the straw. For smaller seedlings or herbs, shallow pockets of 2-3 inches work well.
Fill each hole with compost or potting mix, this gives your plants immediate access to nutrients while their roots establish in the straw. Think of it as giving them a starter home before they move into the bale itself. Pack the mix gently but firmly so it won’t wash away during watering.
Spacing matters here. Larger plants like tomatoes need 12-18 inches between holes, while lettuce or herbs can sit closer at 6-8 inches apart. You can prepare soil pockets across the top of the bale or along the sides if you want to maximize planting space. Side planting works especially well for trailing plants like strawberries.
If you’re planting seeds directly, create shallow troughs instead of individual holes and fill them with a thin layer of seed-starting mix. This gives tiny seeds better contact with moisture and nutrients than bare straw would provide.
Step 5: Plant Your Seedlings
Once your bales are conditioned and ready, it’s time to get plants in the ground. Start by creating a small pocket in the top of each bale, pulling back some of the straw to make a depression about six inches deep and wide enough to comfortably fit your seedling’s root ball. Fill this space with a few handfuls of compost or quality potting mix to give roots something substantial to anchor into as they establish.
Gently remove your seedling from its container and loosen any circling roots before settling it into the pocket at the same depth it was growing previously. If you started seeds indoors and want to prevent leggy seedlings from toppling over, you can plant them slightly deeper in the straw bale than you would in traditional soil. The loose structure provides good support while allowing stems to develop stronger roots along any buried portion.
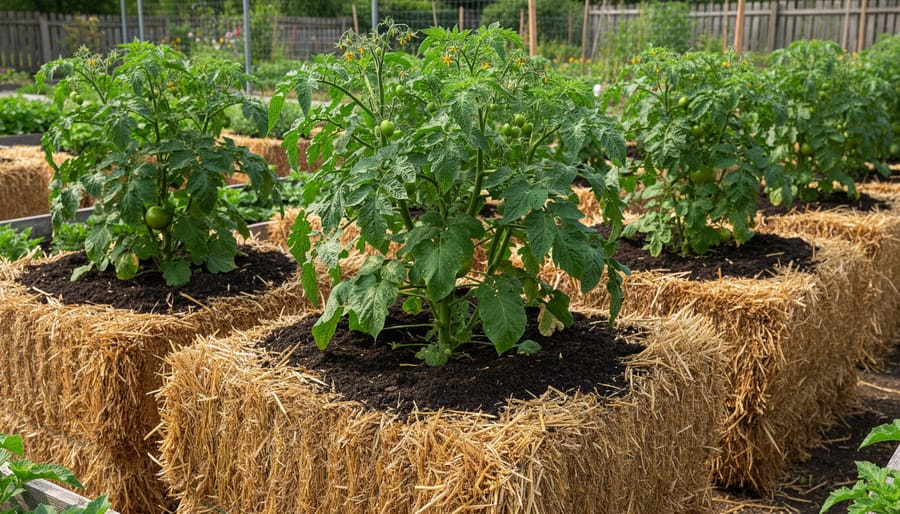
Straw bales work particularly well for heat-loving crops like tomatoes, peppers, and cucumbers, which appreciate the warmth generated during decomposition. In Zone 3 climates, wait until after your last frost date before transplanting these tender plants. Cool-season crops like lettuce, kale, and herbs also thrive in bales and can go in earlier. Space plants according to their mature size, keeping in mind that the excellent drainage means roots won’t compete for oxygen the way they might in compacted garden soil.
Step 6: Water and Maintain
Straw bales dry out much faster than traditional garden beds, so plan to water daily during warm weather, sometimes twice if temperatures spike. Check moisture by pushing your finger several inches into the bale; it should feel damp but not soggy. A light feeding every two to three weeks helps keep plants thriving, though the decomposing straw itself provides some nutrients.
Watch for strong, green growth as your sign that everything’s on track. Yellowing leaves or stunted plants often signal watering inconsistency or nutrient gaps. Pull any weeds that sprout on the bale surface promptly, they’re easier to remove when small. As the season progresses, the bales will settle and break down further, which is normal and actually beneficial for your plants.
Step 7: Plan for the Season’s End
When frost signals the end of your growing season, your straw bales have one final gift to give. By season’s end, those bales will have broken down significantly, transforming into rich, dark compost perfect for enriching your garden beds next spring. Pull out any plant debris and spread the decomposed straw across your vegetable beds or mix it into your soil, it’s loaded with nutrients and organic matter your garden will love.
Most bales won’t survive a second full growing season intact, but they’ve done their job beautifully. Think of them as temporary growing vessels that leave your garden better than they found it. As you clean up, take a moment to note what worked well and what you’d adjust next year. Maybe those cucumbers thrived while the peppers struggled, or you discovered the perfect spot for maximum sun exposure.
We’d love to hear how your first straw bale season went. Share your wins, your surprises, and your “I’ll try that differently next time” moments with fellow Zone 3 gardeners, your experience helps build our community’s collective knowledge.
How to Tell If Your Straw Bale Garden Is Working
A healthy straw bale garden shows clear signs within the first few weeks of planting. Your seedlings will establish quickly, putting down roots into the conditioned straw and showing steady new growth. The bales themselves should feel damp to the touch when you press a hand into them, but not waterlogged. You’re looking for the texture of a wrung-out sponge. As the season progresses, the bales will shrink slightly and darken as decomposition continues, which is exactly what should happen.
Watch for these positive indicators that everything is working as it should:
- Plants produce new leaves and stems within a week of transplanting
- Bale interiors stay consistently moist between waterings
- Root systems spread into the straw when you gently tug on a plant
- No strong ammonia smell coming from the bales
- Bales hold their shape but feel softer than when you started
If your plants seem slow to take off, check the moisture level first. Straw bales dry out faster than garden soil, especially in the early weeks. Press your hand several inches into the planting hole. If it’s dry below the surface, increase your watering frequency. Yellowing leaves early in the season often mean the conditioning process needs more time or the bales need additional nitrogen. You can address this by adding a light application of nitrogen fertilizer and giving the bales a few more days to settle before expecting vigorous growth. The bales are doing their job when your plants grow at the same pace as they would in traditional garden beds, just with less bending and no soil amendments required.
Common Questions About Straw Bale Gardening
Here’s a quick guide to the questions Zone 3 gardeners ask most often when they’re considering this method.
What’s the difference between straw and hay for gardening purposes?
Straw is the hollow stem left after grain harvest, while hay is dried grass and legumes cut for animal feed. Hay contains weed seeds that’ll sprout in your garden and it’s usually too dense for proper plant growth, so always choose straw bales for this method.
Can I reuse straw bales for a second growing season?
Not really. By season’s end, the bales have decomposed significantly as part of the conditioning and growing process. Instead of reusing them, spread the decomposed straw across your regular garden beds as a nutrient-rich amendment or use it as mulch.
Does straw bale gardening work in cold climates like Zone 3?
Yes, it works well in Zone 3 because the decomposing straw generates warmth that can extend your growing season slightly. Just pay attention to your area’s frost dates when planning your planting schedule, same as you would with traditional gardening.
Where can I find straw bales that haven’t been treated with herbicide?
Check with local farms, feed stores, and garden centers, asking specifically whether the straw came from crops treated with persistent herbicides during production. Look for bales held tightly together with twine, and avoid those made from treated wheat or oat straw.
These answers cover the essentials, but don’t hesitate to ask suppliers directly about their bales’ source and treatment history. Most feed stores and farms know their products well and can tell you exactly what you’re getting.
Straw bale gardening offers Zone 3 gardeners a practical way forward when poor soil, limited space, or mobility issues have made traditional gardening feel out of reach. You don’t need perfect conditions or years of experience to get started. The method works because it sidesteps common obstacles rather than demanding you fix them first.
If you’ve tried winter sowing in Zone 3 or other creative approaches to extend your growing season, straw bale gardening fits naturally into that same spirit of working with what you have. Set up your bales this spring, follow the conditioning process, and you’ll discover what grows well in your particular spot through direct experience.
We’d love to hear how your straw bale garden develops throughout the season. Share your observations, your successes, and the adjustments you make along the way. Every Zone 3 garden tells a different story, and your experience helps other gardeners learn what’s possible in challenging climates. Start small if you’re uncertain. Even a couple of bales can produce meaningful results and show you whether this method suits your needs.