
How to Grow Peppers in 5 Gallon Buckets (Zone 3 Success)
Growing peppers in 5-gallon buckets works beautifully, even in Zone 3 climates, and gives you complete control over soil quality, drainage, and heat retention while protecting your plants from unpredictable frost. You’ll get a harvestable crop in about 70-90 days from transplant, provided you choose short-season varieties and start your seedlings indoors 8-10 weeks before your last frost date. The method is surprisingly forgiving for beginners and offers experienced gardeners a way to extend the season by moving containers to sheltered spots when cold snaps threaten.
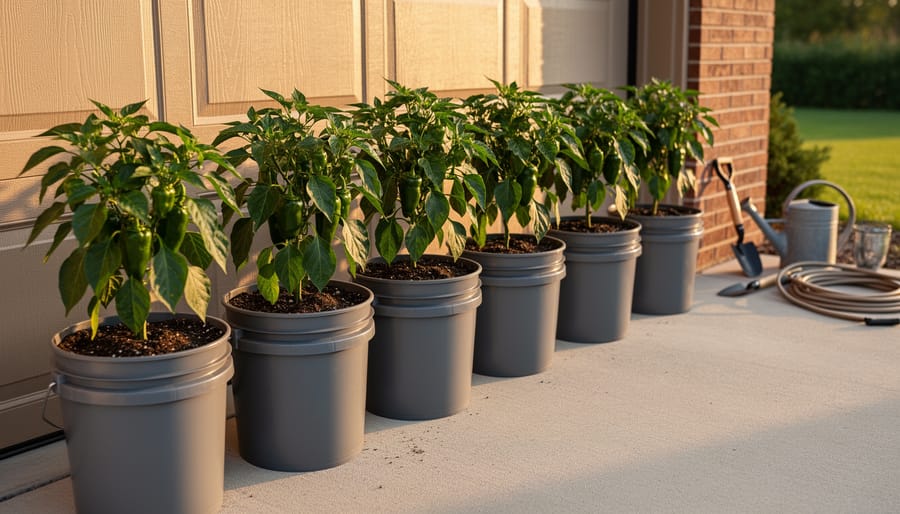
I started bucket gardening peppers five years ago when my garden soil turned out to be heavy clay that stayed cold well into June. That first summer, I lined up six buckets along my south-facing garage wall, and the peppers thrived in ways my in-ground attempts never had. The buckets warmed up faster, drained perfectly, and I could shift them onto my covered porch when September brought those early frosts. My neighbor noticed the setup and asked if it really made that much difference. It did. She’s now grown peppers successfully for three seasons and swears she’ll never go back to fighting our stubborn soil.
Container growing solves the biggest challenges we face in short-season regions: cold soil temperatures, poor drainage, and the inability to protect plants when weather turns harsh. You’re not battling your native soil composition or waiting for the ground to warm up. Instead, you’re creating an ideal microclimate that peppers love, and you can move that environment wherever it gets the best sun and shelter. The setup requires minimal investment, and once you understand the basics of watering and fertilizing container plants, you’ll wonder why you didn’t start sooner.
Why 5 Gallon Buckets Work Perfectly for Zone 3 Peppers
Living in Zone 3 means working with a growing season that can feel impossibly short for heat-loving crops like peppers. When you’re starting from transplant in late May and racing against frost in early September, every advantage counts. That’s where 5 gallon buckets become absolute game-changers for pepper growing.
The portability alone transforms what’s possible in our climate. I’ll never forget the morning I woke to an unexpected frost warning in late August, rolled out of bed at 6 a.m., and moved six bucket peppers loaded with nearly-ripe fruit into my garage. Two hours later, my neighbor was staring at her blackened in-ground pepper plants while mine sat safe and sound. When you can physically pick up your garden and relocate it, you control the environment instead of hoping for the best. Chase the sun throughout the day, move plants to a south-facing wall for extra warmth, or tuck them against the house when a cold snap threatens.
Soil temperature control gives you another critical edge. Black buckets sitting on pavement or a heat-absorbing surface warm up weeks before garden beds, meaning you can transplant earlier without shocking plants into stalled growth. A gardener in Lethbridge shared with me that she starts moving her buckets outside in mid-May for daytime warmth, then rolls them back into her garage at night. By the time the ground is finally warm enough for peppers, her bucket plants are already flowering.
The flexibility for season extension is where bucket growing really shines in Alberta gardens. When September nights dip close to freezing but days still hit 20 degrees, you can move buckets onto a sunny deck or patio where they’ll stay warmer. Several Edmonton gardeners I know routinely harvest ripe peppers into October by moving their buckets into unheated garages overnight and back out during warm afternoons. That’s an extra month of growing time you simply can’t get with in-ground plants.
What You’ll Need: Buckets, Soil, and Supplies
Getting your materials together before you start makes the whole process smoother. I learned this the hard way after three trips to the hardware store in one afternoon. Here’s everything you need to set up your bucket pepper garden, with some Zone 3-specific considerations I’ve picked up over the years.
The Buckets Themselves
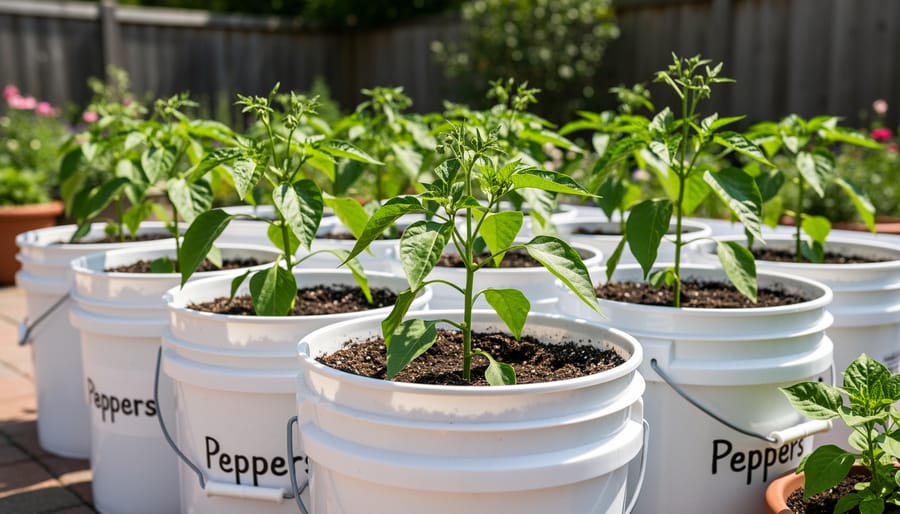
Food-grade 5 gallon buckets are your best bet, especially if you’re growing edibles. Restaurant supply stores and bakeries often give these away, since they receive bulk ingredients in them. If you’re buying new, look for buckets marked with recycling code 2 (HDPE) on the bottom. White or light-colored buckets reflect heat and keep soil cooler during those surprise hot spells we get in Alberta, while dark buckets can help warm the soil earlier in spring. For Zone 3, I actually prefer white buckets since they give me more control over soil temperature with placement.
Materials Checklist
- 5 gallon buckets with handles (one per plant)
- High-quality potting mix, not garden soil (approximately 4 gallons per bucket)
- Perlite or vermiculite for drainage improvement (1-2 cups per bucket)
- Compost or worm castings (1-2 cups per bucket)
- Slow-release organic fertilizer formulated for vegetables
- Drill with 1/2-inch bit for drainage holes
- Small rocks, broken pottery, or landscape fabric for drainage layer
- Tomato cages or stakes (4-5 feet tall)
- Plant ties or soft twine
- Optional: wheeled plant caddies or furniture dollies
- Optional: bucket lids with holes cut out for frost protection
Soil Mix Specifics
Skip the garden soil completely. Container-grown peppers need a lightweight, well-draining potting mix that won’t compact. I use a base of quality potting mix and add about 20% perlite for extra drainage. Peppers are heavy feeders, so mixing in compost right from the start gives them a nutritional boost. The local garden centers in Edmonton and Calgary usually stock decent container mixes by late April, or you can order online if you’re in a more remote area.
Those wheeled caddies aren’t essential, but they’re worth considering if you plan to move buckets around to chase the sun or dodge frost. A loaded 5 gallon bucket weighs around 40 pounds, and at the end of a long day in the garden, wheels make life easier.
Choosing the Right Pepper Varieties for Container Growing
Not all peppers are created equal when it comes to bucket growing in Zone 3, and choosing the right variety might be the single most important decision you make. I learned this the hard way my second year of container gardening, when I optimistically planted a beautiful heirloom that needed 90 days to maturity. It spent all summer growing gorgeous foliage in my bucket, produced exactly three flowers in late August, and gave me zero ripe peppers before our first hard frost. That’s when I got serious about varieties that could actually finish in our short window.
The key is matching your pepper choice to both container constraints and our compressed growing season. You need varieties that mature in 60 to 70 days from transplant, stay compact enough that they won’t tip a bucket in the wind, and can set fruit even when nights dip cooler than peppers typically prefer. This isn’t just about getting any peppers; it’s about getting a harvest you can actually use before September frosts arrive.
For Alberta gardeners and other Zone 3 growers, these varieties consistently deliver in buckets:
- Sweet Banana (65 days) – compact plants, prolific producer even in cool conditions
- Lunchbox Mix (60-65 days) – miniature sweet peppers, perfectly sized for containers
- Mohawk (58 days) – earliest bell pepper, sets fruit in cooler temps
- Pepperoncini (62 days) – reliable pickling pepper, naturally bushy habit
- Shishito (60 days) – compact Japanese variety, handles temperature swings well
- Hungarian Hot Wax (65 days) – medium heat, heavy yields from small plants
- Jalapeno Early (60 days) – faster than standard jalapenos, stays manageable in size
I’ve grown all of these in 5 gallon buckets with success, but Sweet Banana and the Lunchbox varieties are my personal favorites because they start producing early and keep going. Several members of our local gardening group swear by Mohawk for getting at least a few full-sized bell peppers before frost, though it takes more attention to feeding than the others.
Compact growth habit matters more in buckets than you might think. Varieties bred for containers or described as “patio types” develop smaller root systems that fit the space better and don’t demand constant staking against tipping. They also tend to put energy into fruit production rather than endless vegetative growth, which is exactly what you want when you’re racing against a September frost date.
Important Considerations Before You Start
Before you drill your first drainage hole, a few reality checks will save you from the mistakes I’ve watched gardeners make year after year. Container growing looks simple until you’re lugging a 50-pound bucket across your deck or wondering why your peppers turned yellow overnight.
Let’s talk weight first, because this catches everyone off guard. A 5 gallon bucket filled with moist potting mix, a mature pepper plant, and saturated after watering weighs between 40 and 60 pounds. That’s not something you’ll casually move around your yard multiple times a day. If your plan involves chasing sun or dodging frost by relocating buckets, place them on wheeled plant caddies before filling. I learned this the hard way after throwing out my back moving six buckets to shelter during an unexpected June cold snap. Think through your final placement strategy now, not when a frost warning pops up on your phone at 9 PM.
Drainage isn’t optional in container growing. Peppers despise wet feet, and buckets without adequate drainage become swamps that rot roots within days. You’ll need at least six half-inch holes drilled around the bottom perimeter, not just one in the center. The water needs multiple escape routes.
Sun exposure matters differently in Zone 3 than warmer climates. While peppers love heat, our intense summer sun combined with reflective bucket surfaces can actually overheat roots in black containers placed on concrete or south-facing decks. Light-colored buckets or afternoon shade prevents this, though you still want six hours minimum of direct sun. Wind is your other enemy. Buckets tip easier than you’d expect, especially once plants get top-heavy with fruit. Place them against walls, fences, or in naturally sheltered spots. I’ve seen perfectly healthy pepper plants snapped off at soil level by one strong Alberta wind gust.
Timing your transplant separates success from disappointment in our short season. Soil temperature in buckets needs to hit 60°F consistently, which usually means late May or early June here, regardless of what the calendar says about last frost. Jumping the gun by two weeks doesn’t gain you harvest time when cold-shocked plants just sit there sulking for a month.
Step-by-Step: Preparing and Planting Your Buckets
Preparing Your Buckets
Start with clean, food-grade 5 gallon buckets, those bright orange Home Depot buckets work great, or you can ask local bakeries and restaurants for recycled frosting or pickle buckets. If you’re using recycled buckets, scrub them thoroughly with hot soapy water and rinse well to remove any residue that might harm your peppers.
Drainage is absolutely critical. Flip each bucket over and drill 6-8 holes in the bottom using a ½-inch drill bit. Space them evenly across the base, I usually do one in the center and the rest in a circle about an inch from the edge. Don’t skimp here. Peppers hate wet feet, and proper drainage prevents root rot that kills container plants fast.
For Zone 3 gardening, consider wrapping your buckets in light-colored fabric or painting them white if they’re dark colored. Black buckets absorb too much heat during our intense summer sun, cooking roots when temperatures spike. Lighter colors keep soil cooler and more stable. You can also leave buckets natural if you’ll be moving them to shadier spots during heat waves.
Add drainage rock or broken pottery pieces to the bottom inch of each bucket before adding soil. This creates extra seedling support by preventing soil from washing through those drainage holes while keeping roots from sitting in standing water.
Creating the Perfect Soil Mix
Garden soil might be perfect for your in-ground beds, but it’s a recipe for disaster in buckets. I learned this the hard way my first season when I filled containers with what I thought was “good dirt” from my yard. The peppers struggled, the soil turned to concrete when dry and stayed waterlogged when wet, and my harvest was pitiful. Garden soil compacts in containers, crushing those air pockets roots desperately need.
Start with a quality potting mix designed for containers, look for bags labeled “potting mix” or “container mix,” not “garden soil” or “topsoil.” These mixes contain ingredients like peat moss, coconut coir, perlite, and vermiculite that stay loose and drain well while holding moisture. Fill your bucket about two-thirds full with this base mix.
Now add your amendments. I work in about two cups of finished compost per bucket for microbial life and slow-release nutrients. Mix in a handful of balanced organic fertilizer (something like 5-5-5) or a granular tomato/vegetable formula. Peppers are moderate feeders, so you don’t need to go overboard here, we’ll feed them through the season anyway.
Fill the bucket to about two inches below the rim, leaving space to prevent overflow when watering. Here’s a trick that saves headaches later: pre-moisten your soil mix before planting. Dry potting mix repels water at first, creating dry pockets that stress new transplants. I add water gradually, mixing with my hands until the soil feels like a wrung-out sponge, moist throughout but not dripping.
Transplanting Your Pepper Seedlings
The timing window for transplanting peppers into your 5 gallon buckets is narrower in Zone 3 than in milder climates, but the beauty of containers is that you control when that window opens. Wait until nighttime soil temperatures in your buckets stay consistently above 10°C (50°F), which typically happens in late May or early June in Alberta. Cold soil shocks pepper roots and stunts growth for weeks, so patience here pays off. If you’re unsure about when to plant peppers based on your specific microclimate, stick a soil thermometer in your filled bucket and check morning readings for three consecutive days.
Before transplant day, harden off your seedlings over 7-10 days by gradually exposing them to outdoor conditions. Start with an hour of morning sun in a sheltered spot, then increase time and intensity daily. Skip this step and you’ll find scorched, wilted plants by afternoon.
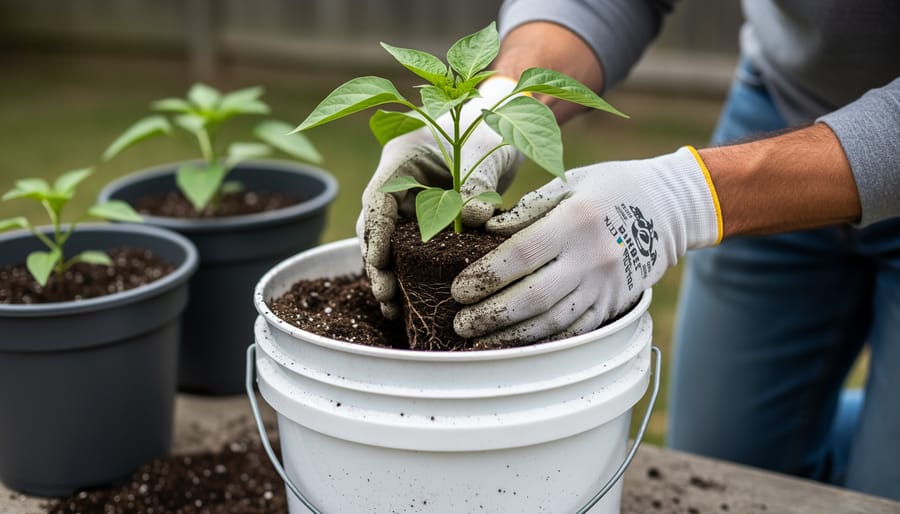
When you’re ready to plant, dig a hole in your prepared bucket soil that’s slightly deeper than the seedling’s root ball. Peppers benefit from being buried up to their first true leaves, similar to tomatoes, which encourages additional root development along the buried stem. Gently remove the seedling from its container, loosen any circling roots, and settle it into the hole. Firm the soil around the base without compacting it heavily.
One pepper plant per 5 gallon bucket is the rule. Two plants compete for nutrients and water in that limited space, and both will underperform. Trust me, I tried cramming in extras my second year and harvested less overall than from individual buckets.
Water thoroughly until it drains from the bottom holes, then insert a stake or cage immediately, before roots spread. Driving in support later risks damaging the root system you just established.
Caring for Your Bucket Peppers Through the Season
Container-grown peppers need more attention than in-ground plants, but the payoff in Zone 3 is worth it. Your buckets dry out faster than garden beds, and nutrients wash through with each watering, so consistent care makes the difference between a handful of peppers and a productive harvest.
Watering: The Most Critical Task
Check your buckets daily, especially once temperatures climb above 20°C. Stick your finger two inches into the soil, if it’s dry, water deeply until it runs from the drainage holes. In hot July and August weeks, you’ll likely water every day, sometimes twice if it’s windy. Early morning watering works best, giving plants moisture before the day’s heat. Avoid evening watering in cool periods, which can leave soil soggy overnight and stress roots. Mulching the soil surface with straw or shredded leaves helps retain moisture and keeps roots cooler during heat spikes.
Feeding Your Container Peppers
Bucket peppers are hungrier than you’d think. Start fertilizing two weeks after transplanting with a balanced liquid fertilizer diluted to half strength. Once flowers appear, switch to a weekly feeding schedule with a fertilizer higher in phosphorus and potassium to support fruit development. I use fish emulsion alternated with a tomato-specific fertilizer, and the results speak for themselves. Container nutrients leach away quickly, so don’t skip feedings, yellowing lower leaves often signal you’re falling behind.
Temperature Management and Bucket Placement
This is where buckets shine in Zone 3. Move them throughout the day if needed to capture maximum sun, or relocate them against a south-facing wall when nights drop below 10°C. On scorching days above 30°C, provide afternoon shade to prevent blossom drop. Monitoring weather forecasts becomes part of your routine, and exploring heat and light solutions can help you optimize growing conditions during unpredictable stretches.
Weekly Maintenance Checklist
- Check soil moisture and water as needed
- Apply liquid fertilizer to support growth and fruiting
- Inspect for pests like aphids and remove by hand or spray with water
- Prune suckers below the first flower cluster for stronger production
- Adjust stakes or supports as plants grow heavier with fruit
- Reposition buckets to optimize sun exposure and temperature
Support becomes essential once peppers start forming. Add stakes or small tomato cages early, before branches laden with fruit start leaning or snapping. In our short season, every pepper counts, so a bit of proactive care prevents losses you can’t afford. Keep plants tidy by removing dead leaves and spent flowers, which improves air circulation and reduces disease risk in our sometimes damp Zone 3 summers.
Extending Your Season: Frost Protection Strategies
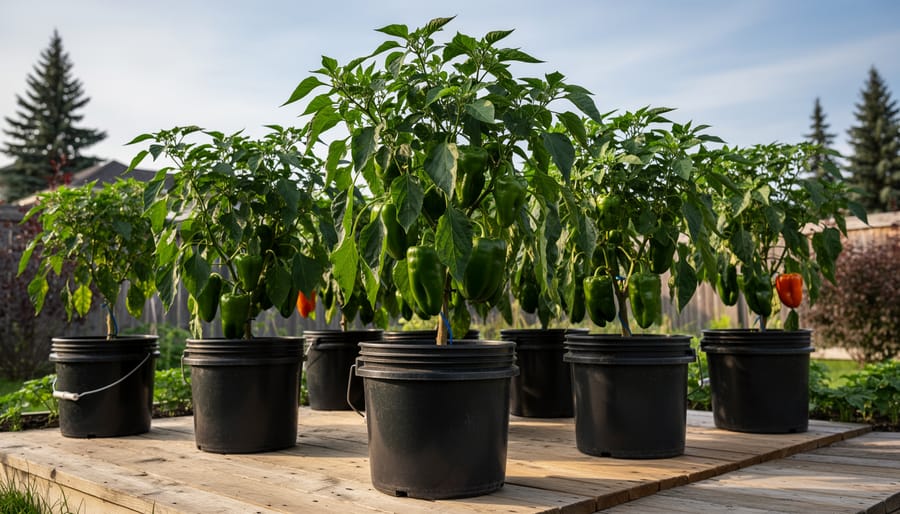
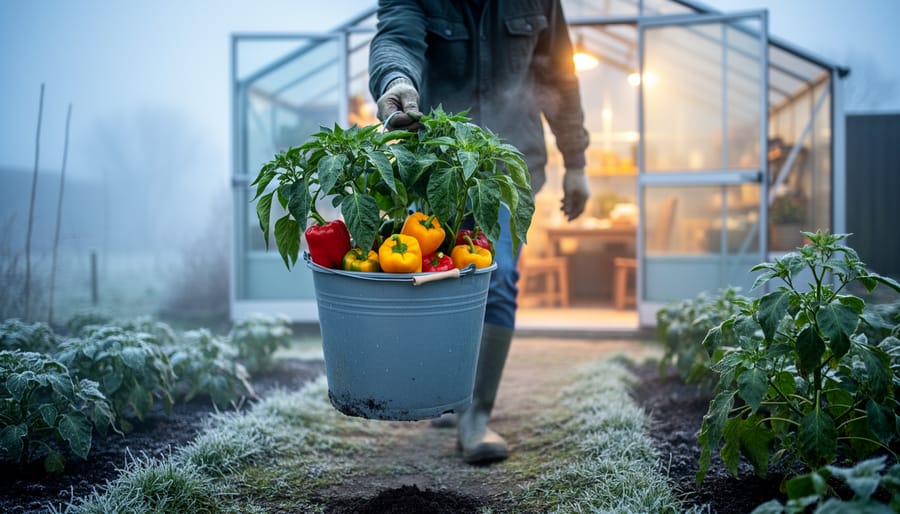
The best part about growing peppers in buckets? You can literally chase the weather. I learned this the hard way one September evening in 2022 when the forecast called for an unexpected overnight frost. I was outside at sunset, hauling my six bucket peppers from the garden bed to the garage, and by morning I had a crop of maturing peppers while my neighbor’s in-ground plants were blackened and done for the season.
When frost threatens, your first line of defense is moving buckets to protected spots. An unheated garage, covered porch, or even against your house’s south wall can provide enough protection for a few degrees’ difference. If you’ve got a sunny window indoors, buckets can come inside for a night or two without issue. I’ve squeezed mine into my mudroom more times than I can count.
For buckets you can’t move, row covers become essential. Drape lightweight fabric over your plants in late afternoon and anchor it with rocks or clips. The fabric traps heat radiating from the soil and can protect against light frosts down to about 28°F. For harder freezes, double-layer your covers or add a sheet of plastic over the row cover, making sure it doesn’t touch the leaves.
Heat retention tricks extend your harvest window significantly. Fill gallon jugs with water and place them around the base of your pepper plants. They absorb heat during the day and release it slowly at night, creating a mini microclimate. Dark-colored buckets also help since they absorb more solar heat than light ones.
As the season winds down and you’re facing inevitable frost, you don’t need perfectly ripe peppers. Pick any peppers that have started to change color and bring them inside to ripen on your counter. Even fully green peppers can be harvested and used, though they’ll be less sweet. Following proper Zone 3 chili care practices throughout the season sets you up for this final push, giving you plants healthy enough to produce right up until you decide to call it.
How to Know Your Peppers Are Thriving (and What to Do If They’re Not)
Healthy bucket peppers show new leaf growth within a week of transplanting and develop a sturdy central stem with dark green foliage. You should see the first flower buds about three to four weeks after moving them outside, though in Zone 3’s cooler conditions, this might take closer to five or six weeks. Don’t panic if growth seems slow at first, peppers are notoriously sluggish until soil temperatures consistently stay above 18°C (65°F). Once they hit their stride, you’ll notice vigorous growth and multiple flower clusters forming.
From transplant to first harvest, expect 75 to 90 days in Zone 3, even with early-maturing varieties. That’s why timing matters so much here. If you transplanted in late May, you’re looking at peppers ready to pick from mid-August through September. The fruits will firm up and reach full size before they change color, and you can harvest them green or wait for them to ripen to red, orange, or yellow depending on the variety.
Watch for wilting between waterings, that’s normal, but if leaves stay droopy even after watering, you’ve got a drainage problem or root rot setting in. Check those drainage holes. Yellowing lower leaves often signal nitrogen deficiency, which happens faster in containers than in-ground gardens because frequent watering leaches nutrients. A dose of balanced liquid fertilizer usually perks them right back up within a week.
Blossom drop frustrates everyone, but it’s common when night temperatures dip below 13°C (55°F) or spike above 32°C (90°F) during the day. You can’t control the weather, but you can move buckets to warmer spots overnight or provide shade during heat waves. Peppers will start setting fruit again once conditions stabilize.
Slow growth despite decent weather usually means the soil mix is compacted or depleted. Containers need more attention than garden beds, think of them as high-maintenance plants with big appetites. If you’re already applying winter sowing tips for your early-season crops, you know how crucial proper soil preparation is year-round.
Ripe peppers will have thick walls, glossy skin, and they’ll snap off easily with a gentle twist. If frost threatens before they ripen, pick them green, they’re still delicious, and you can ripen some indoors on a sunny windowsill.
Common Questions About Growing Peppers in Buckets
After you’ve gone through the planting and care process, certain questions tend to pop up again and again among Zone 3 gardeners trying bucket peppers for the first time. I’ve heard most of these at community garden meetups, and honestly, I’ve wondered about some of them myself over the years. Here are the answers to what people really want to know.
Can you reuse the soil from your buckets next year?
Yes, but you’ll need to refresh it first. Mix in fresh compost and a balanced fertilizer, and consider replacing at least a third of the old soil with new potting mix since nutrients get depleted and soil structure breaks down over time.
How many pepper plants should you put in one 5 gallon bucket?
Stick to one plant per bucket. Peppers need space for their root systems, and cramming multiple plants together leads to competition for nutrients and water, which means smaller yields and stressed plants.
What if your filled buckets are too heavy to move easily?
Plant casters or wheeled platforms underneath your buckets before filling them, or position buckets in their final sunny spot and only move them when absolutely necessary for frost protection. A fully planted 5 gallon bucket can weigh 40-50 pounds.
Do peppers in buckets need full sun like garden-planted peppers?
Yes, they still need 6-8 hours of direct sunlight daily for good production. The advantage with buckets is that you can move them to follow the sun or relocate them if you realize your initial spot wasn’t sunny enough.
How often should you water peppers in buckets?
In hot weather, you’ll likely need to water daily, sometimes twice a day during heat waves. Containers dry out much faster than garden beds, so check soil moisture by sticking your finger two inches down, if it’s dry, water thoroughly until it drains from the bottom.
Can you start pepper seeds directly in the buckets instead of transplanting?
You technically can, but I don’t recommend it for Zone 3. Direct seeding wastes precious growing days since peppers are slow to germinate and need warm soil, and you can’t control conditions as easily as you can indoors under lights.
One question I get asked in person more than any other is whether bucket peppers actually taste as good as garden-grown ones. The answer is yes, absolutely. Your peppers don’t know they’re in a bucket instead of the ground. What they care about is consistent water, adequate nutrients, warmth, and sunlight. If you provide those things, a bucket pepper will be just as sweet, crisp, and flavorful as any pepper grown in a traditional garden bed.
The beauty of bucket growing is that you actually have more control over giving your plants exactly what they need, which can lead to healthier, more productive plants than you’d get in marginal garden soil. I’ve had bucket peppers outproduce their in-ground cousins simply because I could fine-tune their care and protect them from our unpredictable Zone 3 weather swings.
Growing peppers in 5 gallon buckets isn’t just a workaround for Zone 3 limitations. It’s actually a strategy that puts you in control of nearly every variable that matters for pepper success. When you can move your plants to catch the best sun, protect them from unexpected frosts, and manage their soil temperature precisely, you’re no longer at the mercy of our short season. You’re working with it.
I won’t pretend there isn’t a learning curve. Your first year might teach you more about what doesn’t work than what does. Maybe you’ll overwater, or choose a variety that needs more time than our season allows, or forget to harden off your seedlings properly. That’s all part of the process, and honestly, those lessons stick with you far better than immediate success ever would.
But when you harvest your first fully ripe pepper from a bucket you tended all summer, something shifts. Suddenly those September frost warnings feel less like defeat and more like a challenge you’ve already figured out how to handle. You’ve grown a warm-season crop in a cold climate, and you did it with containers, determination, and a handful of strategies that actually work.
I’d love to hear how your bucket pepper adventure unfolds. What varieties surprised you? Which challenges caught you off guard? Our Zone 3 gardening community thrives when we share what we’ve learned, failed at, and figured out together. Your experience matters, whether it’s your first season or your tenth. Here’s to fresh peppers and the satisfaction of making them happen against the odds.