
How to Care for Your Young Chili Plant in Zone 3: From Seedling to Garden Success
Growing chili peppers from seedling to harvest in Zone 3 takes about 90 to 120 days total, but the critical first six to eight weeks nurturing young plants indoors will make or break your summer harvest. Your chili seedlings need consistent warmth (18-24°C), bright light for 14-16 hours daily, and careful watering to develop strong roots and sturdy stems before they ever see the outdoors. Get these early weeks right, and you’ll have stocky, resilient transplants ready to brave our short growing season.
I learned this the hard way during my second year of gardening here in Alberta. My first batch of chili seedlings stretched tall and spindly under a single windowsill, flopping over the moment I moved them outside. They never recovered. The following season, armed with a basic grow light and a better understanding of what young peppers actually need, I watched compact, dark-green plants develop thick stems and healthy leaves. Those plants went on to produce more chilies than my family could use.
The truth is, Zone 3 doesn’t forgive weak starts. Our frost-free window is too brief to let plants catch up from a rough beginning. But here’s the good news: caring for young chili plants isn’t complicated once you understand the handful of variables that matter. Transplant shock, leggy growth, and damping-off disease are all preventable with the right techniques at the right time. Hundreds of gardeners in our community now grow thriving pepper plants every summer, and you’re about to join them with a clear, stage-by-stage approach that accounts for our unique climate challenges.
What You’ll Need to Nurture Young Chili Plants
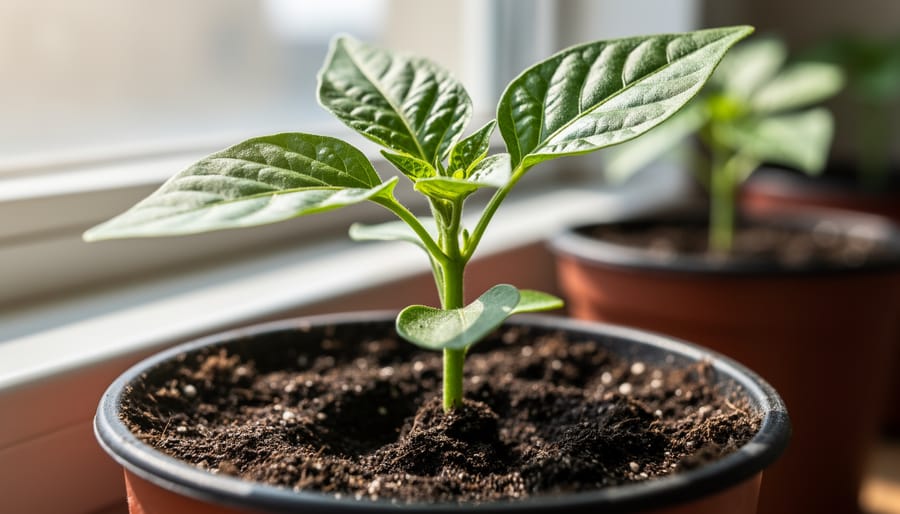
Growing young chili plants in Zone 3 requires a bit more gear than our milder-climate friends might need, but every item on this list serves a real purpose in getting tender peppers through our short season. I learned this the hard way my first year when I tried to wing it with whatever I had lying around, turns out that old potting soil and a south-facing window weren’t quite enough.
Here’s what you actually need, organized by the stages your young chili plants will move through:
- Indoor growing: Containers with drainage (3-4 inch pots work well), fresh seed-starting mix or quality potting soil, full-spectrum grow lights or LED shop lights, a timer for consistent light cycles, gentle liquid fertilizer (half-strength), and a spray bottle for misting
- Hardening off: Sheltered outdoor spot (porch or against a south wall), shade cloth or cardboard for sun protection, something to cover plants if frost threatens, and a thermometer to track temperature swings
- Transplanting: Trowel, compost or aged manure, mulch (straw works great), plant supports or small stakes, row covers or cloches for season extension, and a watering can with a gentle rose attachment
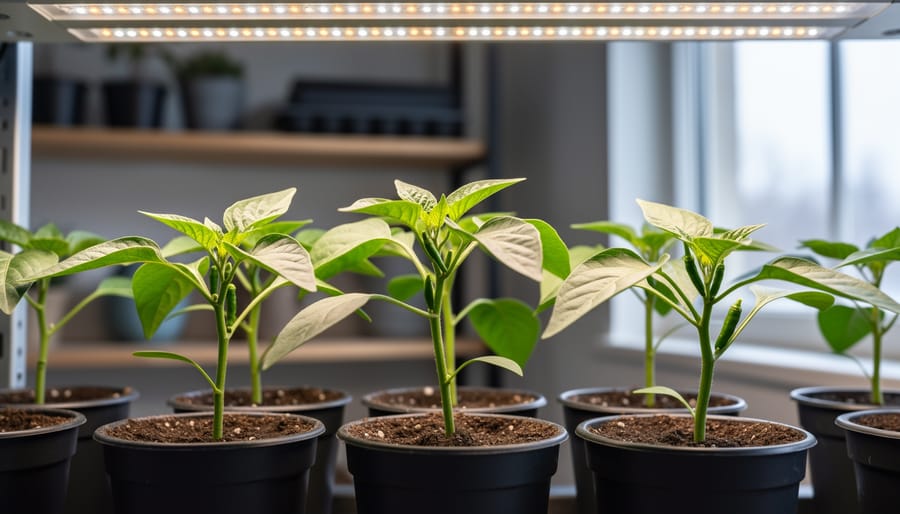
The grow lights deserve special mention because our Zone 3 spring days simply don’t provide enough intensity for stocky, vigorous growth. You don’t need expensive specialty lights, I’ve had excellent results with basic LED shop lights positioned 4-6 inches above the seedlings and run for 14-16 hours daily. Think of them as an investment that pays off in stronger plants that can handle our sometimes brutal transition to outdoor life.
For those exploring innovative approaches, zone 3 agrivoltaics can extend your growing capabilities, though traditional season extension tools like row covers remain the most accessible option for most backyard growers. The key is having your supplies ready before you need them, scrambling to find row cover fabric during an unexpected May cold snap is no fun when your young plants are already outside.
Important Warnings Before You Begin
Before you dive into caring for your young chili plants, I need to be straight with you about the mistakes that can turn your pepper-growing dreams into compost. These aren’t minor hiccups; they’re the pitfalls that have left many Zone 3 gardeners staring at wilted stems and wondering what went wrong.
Frost Will Kill Your Young Plants, Period
Unlike some hardy vegetables that bounce back from a light frost, young chili plants are incredibly tender. Even temperatures that hover just above freezing can cause permanent damage. In Zone 3, our last frost date typically falls between late May and mid-June, but I’ve seen snow in early June more than once. Don’t let those gorgeous sunny April days fool you into thinking it’s planting time, unlike early spring blooms that can handle our unpredictable weather, pepper seedlings have zero frost tolerance.
Hardening-Off Isn’t Optional
Rushing the hardening-off process or skipping it entirely will shock your plants so severely they may never recover. I learned this the hard way when I lost six beautiful seedlings by moving them directly from my sunny windowsill to the garden. The sudden change in light intensity, wind exposure, and temperature swings can be fatal.
Overwatering Kills More Seedlings Than Underwatering
Young chili plants need consistently moist soil, not soggy conditions. Their delicate roots rot quickly in waterlogged soil, especially when plants are indoors under grow lights where evaporation is slower. If you’re watering daily, you’re probably overdoing it.
Step-by-Step: Caring for Your Young Chili Plant
Getting Started: The First Few Weeks Indoors
Your young chili seedlings need consistent warmth and bright light from the moment they emerge. I learned this the hard way my first year, weak, stretched stems and pale leaves taught me that “a sunny windowsill” wasn’t enough for peppers in our Alberta climate.
Position your seedlings under grow lights immediately. They need 12-16 hours of light daily, positioned 5-10 cm above the tops. Yes, that close. Young chili plants will stretch desperately toward inadequate light, creating those frustrating leggy stems that never quite recover. I set my lights on a timer at 6 AM to 10 PM, which mimics optimal spring conditions and removes the guesswork.
Temperature matters just as much as light. Keep daytime temperatures between 21-24°C and nighttime around 18-20°C. These tropical plants stall below 15°C, so if you started seeds through winter sowing or other cold methods, they absolutely must transition to warmth now. A seedling heat mat helps, but most homes maintain adequate temperatures once seeds have germinated.
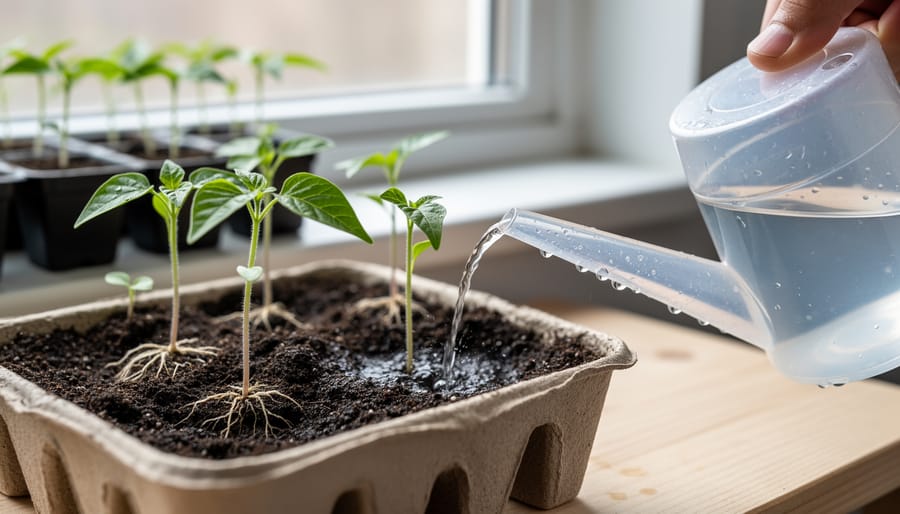
Water only when the soil surface feels dry to your fingertip. Overwatering kills more young chili plants than any pest ever will. Their delicate roots need oxygen as much as moisture. I bottom-water my seedlings, setting trays in a shallow pan for 10-15 minutes, then draining completely. This encourages roots to grow downward seeking moisture.
Hold off on fertilizer until true leaves appear, those recognizable pepper-shaped leaves, not the initial rounded seed leaves. Then start with quarter-strength liquid fertilizer weekly. Young plants need gentle nutrition, not aggressive feeding. Full-strength fertilizer burns tender roots and creates weak, overfertilized growth that struggles later in the garden.
Building Strength: The Hardening-Off Process
This is where most first-time pepper growers lose their plants, and I learned that lesson the hard way. My first batch of pampered indoor chili seedlings hit the Alberta sun and wind on day one, and by evening they looked like wilted lettuce. Your young chili plant needs hardening off over 7-10 days to build the toughness required for outdoor life, and there’s what Alberta can learn from growers in similar climates about pacing this transition correctly.
Start the process around May 20-25 in most Zone 3 areas, timing it so transplanting happens after your last frost date. Days 1-2, place your young plants outside in complete shade for just 1-2 hours during the warmest part of the day, around midday when temperatures hit 15°C or above. Bring them in before any temperature drop. Days 3-4, increase to 3-4 hours and introduce dappled sunlight, still avoiding direct afternoon sun and any wind exposure. Watch for leaf curl or whitening, which signals too much too fast.
Days 5-6, move to morning sun only for 4-5 hours. Morning light is gentler than afternoon blast, and your chili plants can handle it better. Leave them out during mild breezes so stems start strengthening. Days 7-8, try 6-8 hours including some afternoon sun, and let them experience light wind. Check soil moisture twice daily now, as outdoor air dries pots faster than your indoor shelf ever did.
Days 9-10, if overnight temperatures stay above 10°C, leave plants out all day and consider an overnight trial under cover. Monitor the forecast obsessively. A surprise 5°C night will damage tender tissue even if it doesn’t technically freeze.
Your chili plants should develop thicker stems, darker leaves, and a sturdier overall appearance throughout this process. If they stay pale and floppy, slow down. Better to take 12 days than to rush and replant from scratch.
Making the Move: Transplanting to the Garden
I’ll never forget my first year trying peppers, I stuck them in the sunniest spot I could find, patted myself on the back, and watched them sulk for three weeks straight. Turns out, sun alone isn’t enough in Zone 3. You need warmth trapped at ground level, protection from our relentless wind, and soil that actually heats up before Canada Day.
Start by choosing a south-facing location against a wall, fence, or even large rocks if you have them. These surfaces absorb daytime heat and radiate it back at night, creating a microclimate several degrees warmer than open garden space. I tuck mine against the garage’s south wall every year now, it buys me an extra two weeks of growing time on both ends of the season.
Prepare your soil a week before transplanting. Work in finished compost and ensure good drainage; waterlogged roots in our cool spring soil invite disaster. Space plants 45 to 60 centimeters apart. Crowding seems efficient but limits airflow and makes each plant compete for precious warmth.
Plant at the same depth the seedling sat in its container. Unlike tomatoes, peppers don’t develop adventitious roots along buried stems, so there’s no benefit to deep planting. Water thoroughly at transplanting, then hold off for two days unless it’s exceptionally hot, overwatering cold soil stresses roots more than brief dryness.
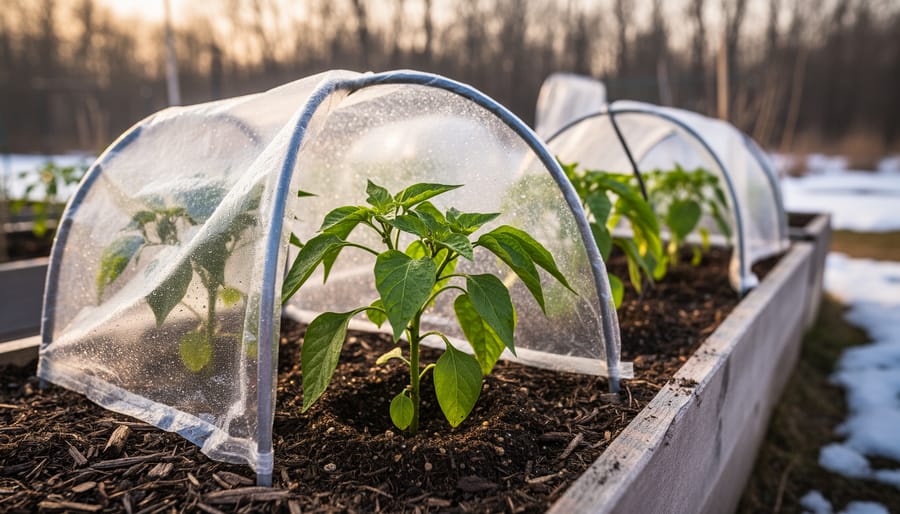
Now for the Zone 3 secret: season extenders aren’t optional, they’re essential. I use red plastic mulch to warm soil (black works too), then protect each plant with a wall-of-water or a simple cloche made from cut milk jugs for the first ten days. Raised beds warm faster than ground-level plots and drain better after our heavy spring rains.
Early Garden Care: The Critical First Month
The first month after transplanting determines whether your young chili plant becomes a productive powerhouse or struggles all season. I check mine daily during this period, not helicopter parenting, just smart gardening in our unpredictable Zone 3 weather.
Water deeply every 2-3 days rather than light daily sprinkles. Your young plants need moisture reaching 6 inches down to encourage strong root development. I stick my finger in the soil; if it’s dry past the first knuckle, it’s watering time. Morning watering prevents disease and gives plants the whole day to absorb what they need.
Apply 2-3 inches of organic mulch around each plant once soil warms fully, keeping it an inch away from stems. This conserves moisture and moderates soil temperature swings that stress young roots.
Install stakes or small cages now, before plants develop extensive roots. Even compact varieties benefit from support as they establish themselves.
Watch for yellowing leaves, wilting during cool spells, or sudden growth slowdowns, your plant’s way of signaling stress. Adjust care accordingly, and resist the urge to overfertilize during this vulnerable phase.
How to Know Your Chili Plant Is Thriving
A healthy young chili plant shows you it’s thriving through clear visual signals. Look for deep green leaves that feel firm to the touch, not papery or limp. New growth should appear consistently from the center of the plant, with leaves unfurling every few days once your seedlings have settled into their outdoor home. The stem should thicken noticeably week by week, developing a sturdy, woody base rather than remaining thin and flexible.
In our Zone 3 climate, growth happens more slowly than seed packets suggest. After transplanting in late May or early June, expect your young plants to pause for about a week as they adjust to their new environment. Then you’ll see about half an inch to an inch of new growth per week during June. This seems modest compared to gardeners in warmer zones, but it’s perfectly normal for our conditions.
Watch for the first flower buds to appear roughly six to eight weeks after transplanting, typically in mid-to-late July for most varieties. The plant will branch more actively once buds form, and you’ll notice leaves becoming slightly darker and thicker. First fruits usually set by late July or early August if conditions cooperate.
Stress signals are equally important to recognize. Pale or yellowing lower leaves often mean your plant needs nitrogen. Purple-tinged leaves and stems indicate the soil is still too cold at night, which slows phosphorus uptake. Curling or cupped leaves suggest inconsistent watering or wind stress. If growth stalls completely for more than ten days after the initial transplant adjustment period, check your watering schedule and consider a half-strength feeding.
Leaf drop is the most serious warning sign. A young plant shedding multiple leaves at once is struggling, usually from transplant shock, cold nights below 10°C, or root disturbance. Move quickly to provide protection and consistent conditions if this happens.
Your Questions About Young Chili Plants in Zone 3
Over my years of guiding Zone 3 gardeners through pepper growing, I’ve heard the same worries and questions surface again and again. Here are the answers to what keeps most of us up at night when we’re nursing those young chili plants.
When is it actually safe to transplant young chili plants outdoors in Zone 3?
Wait until nighttime temperatures consistently stay above 10°C and all risk of frost has passed, typically late May to early June in Alberta. Transplanting too early, even if daytime temps look promising, will stunt or kill your young plants.
Which chili varieties actually produce fruit in our short season?
Stick with early-maturing varieties that need 60-75 days from transplant to harvest: jalapeños, Hungarian hot wax, early cayenne, and habanadas all work well. Superhots and most poblanos need too long and will disappoint you here.
Can I start chili plants directly in the garden or do they have to go indoors first?
In Zone 3, you absolutely must start chili plants indoors 8-10 weeks before your last frost date. Direct seeding outdoors doesn’t give peppers enough time to mature before our first fall frost arrives in September.
My young chili plant got hit by an unexpected late frost – is it dead?
Not necessarily. If just the leaves are damaged but the stem is firm, cut back the blackened foliage and give it a week to recover indoors or under protection. I’ve had plants bounce back from light frost damage, though they’ll be set back 2-3 weeks.
How many peppers can I realistically expect from one young plant in our climate?
With good care and the right variety, expect 8-15 peppers per plant in Zone 3. That’s fewer than gardeners in warmer zones get, but each one tastes like victory when you’ve grown it through our challenges.
Why are my young chili plant’s leaves turning purple?
Purple leaves on young peppers usually signal cold stress or phosphorus deficiency triggered by cold soil. Move the plant to a warmer spot and ensure soil temps are at least 18°C before transplanting outdoors.
The biggest mistake I see new Zone 3 pepper growers make is comparing their results to what gardeners in Zone 5 or warmer achieve. Your young chili plants aren’t failing because you’re doing something wrong – they’re adapting to genuinely difficult conditions. Celebrate smaller harvests, later maturity, and the extra effort required. Every pepper you pick in September represents knowledge you’ve gained about microclimates, variety selection, and season extension.
When you find yourself second-guessing your approach, remember that thousands of Alberta gardeners have figured this out before you. We’re all learning together, adjusting our methods each season, and sharing what works. Your questions aren’t signs of failure – they’re exactly what every successful Zone 3 pepper grower asked when they started.
Growing chili plants in Zone 3 isn’t just possible, it’s deeply rewarding when you give those young seedlings the care they need. You’ve now got the roadmap from those first fragile leaves under grow lights all the way to sturdy transplants ready for Alberta’s unpredictable summer. Will every plant thrive? Honestly, probably not. Some years the weather doesn’t cooperate, and that’s okay. Each season teaches you something new about timing, hardening off, or finding that perfect warm microclimate in your yard.
What makes this journey worthwhile isn’t just the harvest (though homegrown jalapeños truly taste better). It’s becoming part of a community of Zone 3 gardeners who understand the triumph of coaxing heat-loving plants through our short season. We’re all figuring this out together, sharing what works and what doesn’t.
I’d love to hear how your young chili plants are doing. What varieties are you trying? What’s your biggest challenge? Drop a comment or connect with other Alberta pepper growers online, there’s real knowledge in our collective experience.
Here’s to strong seedlings, successful transplants, and the satisfying crunch of that first ripe pepper you grew yourself.